[ad_1]
Palworld devoted servers can host as much as 32 gamers combing via its islands for Pokémon-like monsters and beneficial sources. Developer Pocketpair has plans to extend that quantity in a future replace, in addition to add an in-game methodology for server internet hosting. Proper now, although, internet hosting your individual Palworld devoted server takes a couple of further steps.
To arrange a multiplayer server, you want the Steam model of the sport. As a result of complexities of updating video games on consoles, the Xbox/Microsoft Retailer/Recreation Move model of the sport does not presently enable devoted servers of any sort. The one approach to have a persistent multiplayer server for you and your pals is to purchase it on Steam, and since crossplay is not a factor but, your pals will want it there too.
The method to arrange a Palworld devoted server is generally painless, however needless to say different gamers might want to know your IP handle to affix. You do not need to go round asserting your IP handle to random individuals, so watch out with who you give it to.
The way to setup a devoted server
Picture 1 of two

You could find detailed directions on methods to arrange your Palworld devoted server beneath, however this is a short listing of steps:
Set up and launch Palworld onceInstall Palworld Devoted Server (allow Instruments when you do not see it)Open Palworld Devoted Server set up folderOpen DefaultPalWorldSettings.ini and duplicate all the pieces beneath line 3Navigate to PalServerPalSavedConfigWindowsServer and paste textual content into PalWorldSettings.iniChange desired settings then saveLaunch Palworld Devoted ServerChoose Play Palworld Devoted Server and click on Play
The way to arrange your devoted server
As soon as you’ve got bought Palworld on Steam, it’s going to present up in your recreation library. You may have to launch the sport as soon as so it creates all of the information it wants in its set up folder.
After that, shut the sport and search for “Palworld Devoted Server” in your Steam library. If it does not present up, click on the drop down filter menu above your listing of video games and allow “Instruments”. Earlier than you click on Launch, proper click on Palworld Devoted Server within the listing, hover your cursor over Handle and choose Browse native information to deliver up its set up folder.
Within the folder, there are a variety of information, however you solely want to fret about “DefaultPalWorldSettings.ini”. For the subsequent step, it is advisable to open it with a program like Notepad by proper clicking it, hovering over Open with and choosing your required textual content editor.
Choose and duplicate all of the textual content beneath the third line the place it says “To alter the server settings…” It ought to embrace “[/Script/Pal.PalGameWorldSettings]” and all of the textual content beneath it. Shut the window and return to the PalServer folder that you simply had been on a second in the past.
Now it is advisable to paste all that textual content into one other file. That one is situated in PalServer > Pal > Saved > Config > WindowsServer. Amongst all of the ini information in there, you will see “PalWorldSettings.ini”. Open it with Notepad identical to you probably did the earlier file and paste the textual content in.
You possibly can change a couple of issues in right here earlier than you save and shut the file. Under is an inventory of an important settings you’ll be able to change by changing the textual content between the quotes:
ServerName – The identify of your serverServerDescription – A brief description of your server ServerPassword – A password gamers have to entry the server (passwords require a workaround defined beneath) AdminPassword – A password you will have to entry admin instructions
While you’re performed, save the file and shut it.
It is lastly time to get your Palworld server on-line. Launch Palworld Devoted Server out of your recreation library. A window will present up asking you if you wish to play on a devoted server or begin a group server. Neighborhood servers are public and present up within the recreation’s multiplayer menu, however some are having bother getting theirs to work, so let’s skip it for now. Select Play Palworld Devoted Server and click on Play.
Whereas it is loading up, Home windows would possibly ask you to permit private and non-private networks to entry it. Click on “Sure”, and look ahead to a Command Immediate window to look. You may have to preserve that window open for the server to run no matter whether or not you are taking part in or not.
The way to be a part of your devoted server
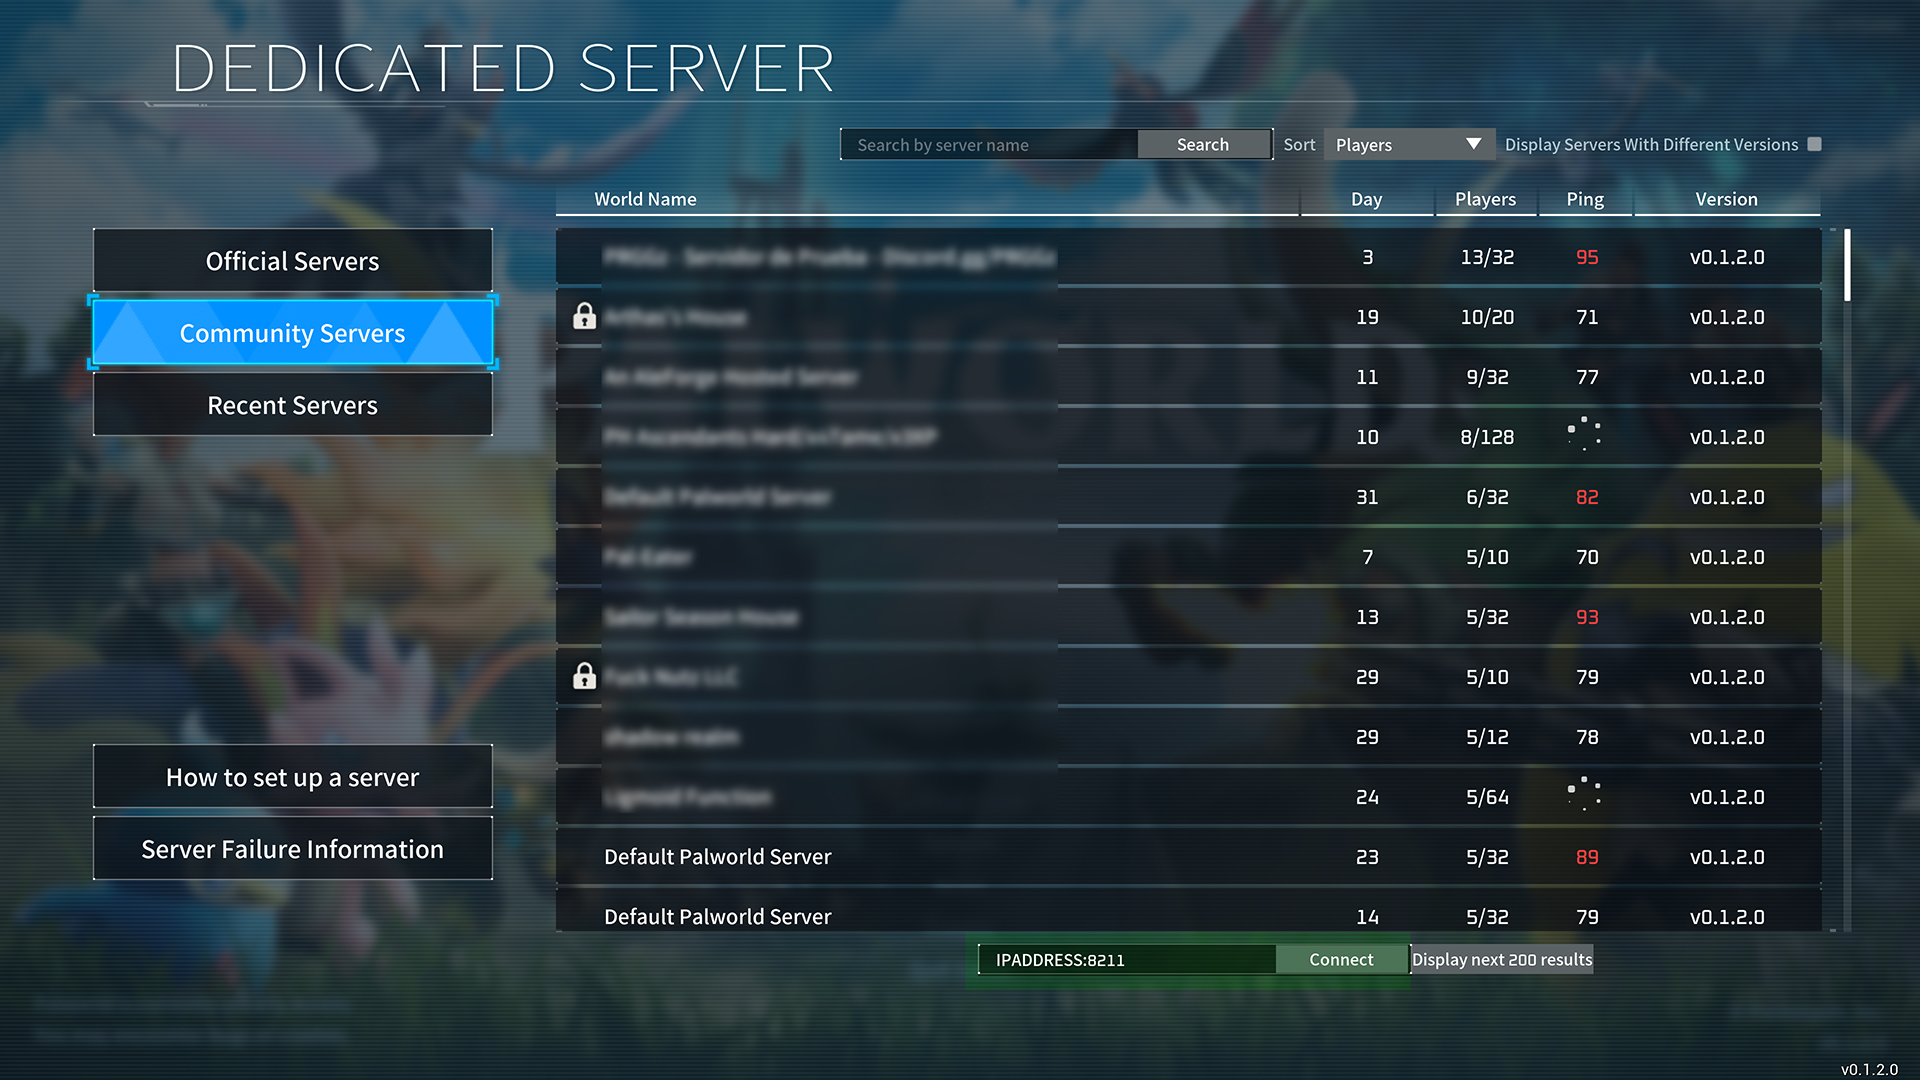
Anybody who desires to play in your new server might want to launch the sport and choose “Be a part of Multiplayer Recreation” from the principle menu. That choice will deliver you to the devoted server browser.
On the backside of the display screen there’s a textual content field to enter the server’s IP handle into. You could find your exterior IP by visiting WhatIsMyIP and copying the general public IPv4 handle. By default, gamers might want to enter your IP handle (or the handle of whoever’s internet hosting the server) adopted by a colon and the port listed within the settings file from earlier. When you did not change something, it ought to appear to be this: “YourIPAddress:8211”
Devoted server password repair
Server passwords do not appear to persistently work appropriately in Palworld. If the sport says “no password has been entered” once you attempt to be a part of a server, observe these steps to repair it:
Choose Be a part of Multiplayer Recreation from the principle menu Choose Neighborhood Servers Discover a server with a lock icon and enter the password on your personal server (belief me, it really works) Choose OK after which NO when it asks if you wish to join Enter your IP and port quantity within the backside textual content field like regular and hit Join
The way to save and shut your server
Technically, you’ll be able to shutdown your server by closing the Command Immediate window, but it surely’s in all probability a greater thought to make use of the admin instructions. While you’re within the recreation, press enter to open chat, kind “/AdminPassword”, hit area, kind the admin password you set earlier, and hit enter once more. Now you should utilize instructions like “/Save” to save lots of the server and “/Shutdown” to shut it.
[ad_2]
Source link
